It is easy to mosaic. Not many supplies are needed and it is a fast project. For this project I used tiles that have smooth edges. Another time I will post how to break dishes, tiles to use for creating mosaics.
Please remember that these tiles were just loose in a box. First you get a piece of hardibacker from your local building store like Lowe's, etc. I apologize for not having photos of this step. Lay the tiles loose on the board to decided how big to cut the hardibacker board. Dust off the board really good and start gulling the tiles down one at a time with either spray adhesive like or a paste adhesive that are sold for laying tiles.
With this one, I penciled around the tiles so I would be able to glue them on without guessing where they go.
Now it is time to add the grout. Supplies needed: container for water, container for mixing grout in, grout (I used KeraColor grout which I purchases at our local Lowe's, gloves, spoon and/or knife for mixing, old towel.
Here are the kind of gloves I like to use. They allow me to feel the grout as I spread it over the tiles and provide protection if you are using broken tiles. These are all store bought and have smooth edges.
A close up of the grout I use.
Pour some grout into a container that you do not want to keep. Add water and mix it until it is consistency of creamy peanut butter. The grout is very fine sand so you may want to wear a mask if you are sensitive to dust.
Stir the water and grout with a disposable plastic spoon adding either ingredient as needed to get the right consistency.
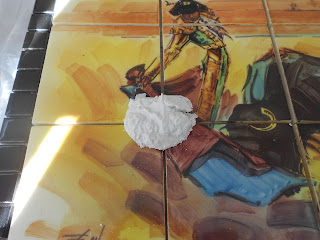
Spoon a bit of the creamy grout on the piece you need to grout.
Rub in circular motion until the cracks are sufficiently filled in. It is good to put a few layers on rapidly to make sure grout is completely filling in the spaces between the tiles.
Here you can see how I have filled in a lot of the spaces but there is residue of grout on the tiles.
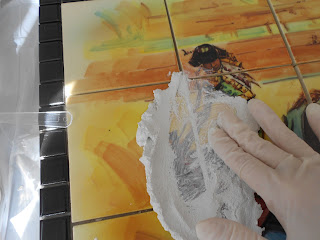
Start wiping off the residue grout with your old towel pressing gently to smooth out and even off the edges along the spaces you filled in. I love to see the shiny tile pictures or designs start so show.
Here is part of the beautiful painting cleaned off with the grout having filled the spaces in nicely.
Wanted to show you how I also grout the outer edge of the tiles all the way around and do the same gentle scrubbing and evening off the grout with you towel.
A closeup of the part of the beautiful painting!
The finished Bullfighter Mosaic!
One piece at a time............
One piece at a time............


No comments:
Post a Comment
I would love to hear your comments!